Wheel damage assessment before refinishing

Audi rim repair Dubai

Arrange Audi rim repair in Dubai for curb rash, finish damage, suspected bending or vibration with the wheel condition assessed before a repair method is promised. Photos can help with initial routing, while safety, runout, material loss and tyre condition need an in-person decision.

Cosmetic and structural reviewRepairability assessed firstTyres checked alongside wheels
Technician assessing the alloy rim of a current Audi RS Q8 in a Dubai workshop
Inspect the wheel as fittedDamage location, tyre condition, vibration history and the requested finish are recorded before removal.
Send clear photographsShow the complete wheel plus close views of the damaged face, lip and tyre sidewall.
Describe the impactState whether the concern followed a curb touch, pothole, collision or unexplained vibration.
Expect a repairability checkSome cracks, deformation or material loss may make replacement the safer decision.
Confirm the finishPainted, polished, machined and multi-tone surfaces can require different restoration routes.
Wheel work in context

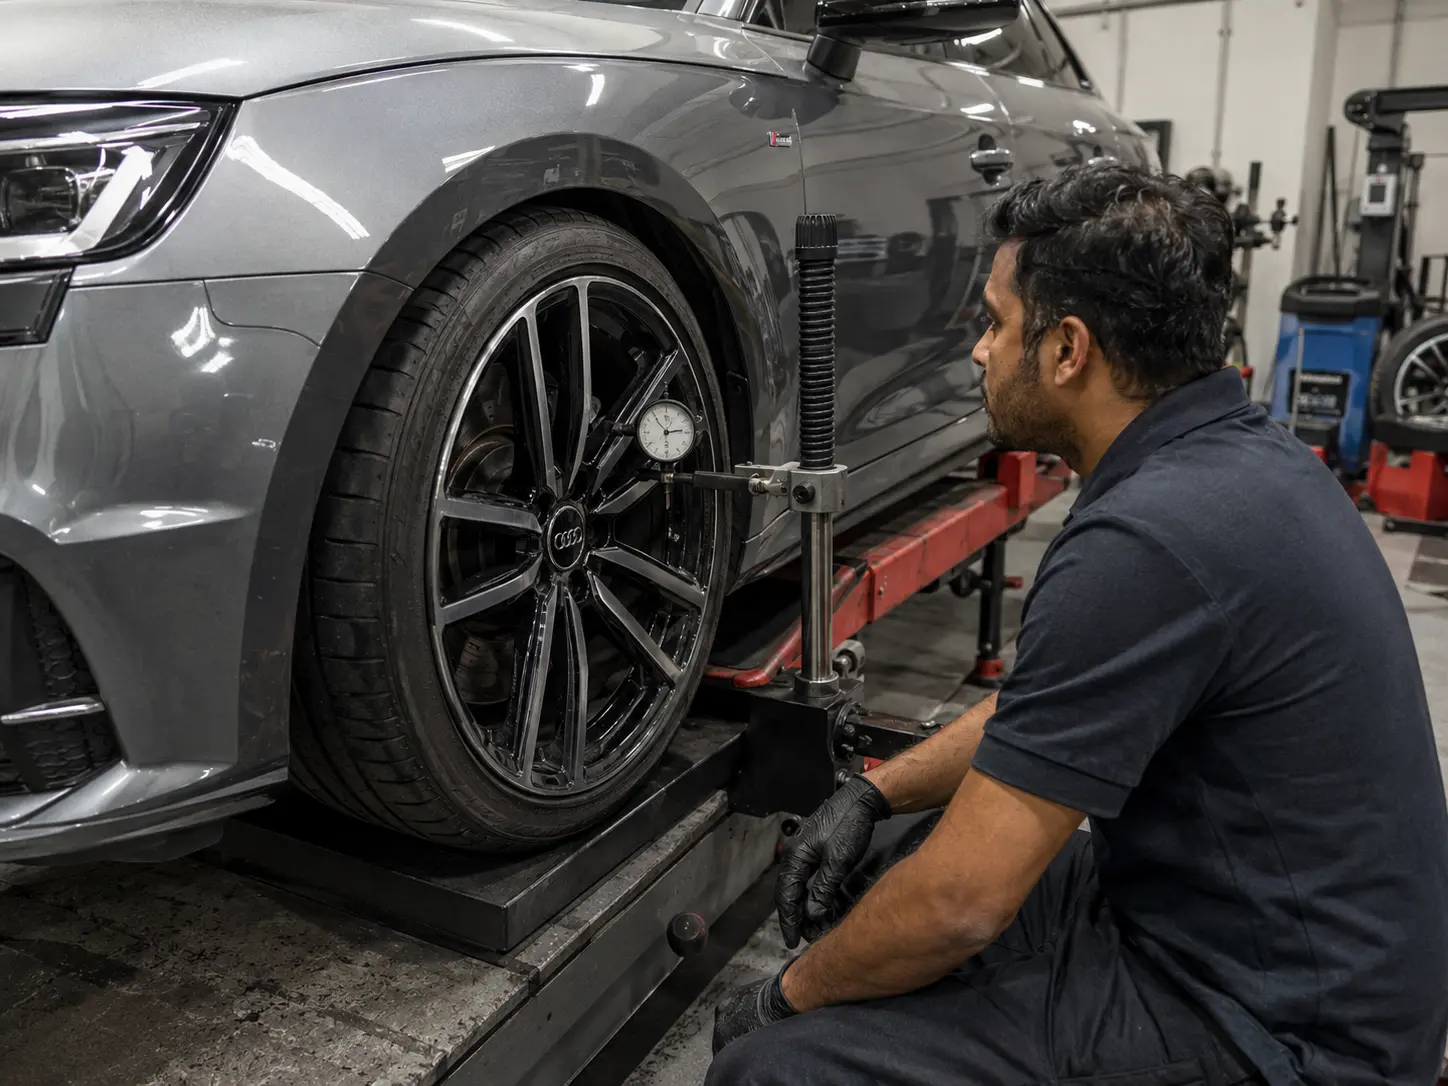
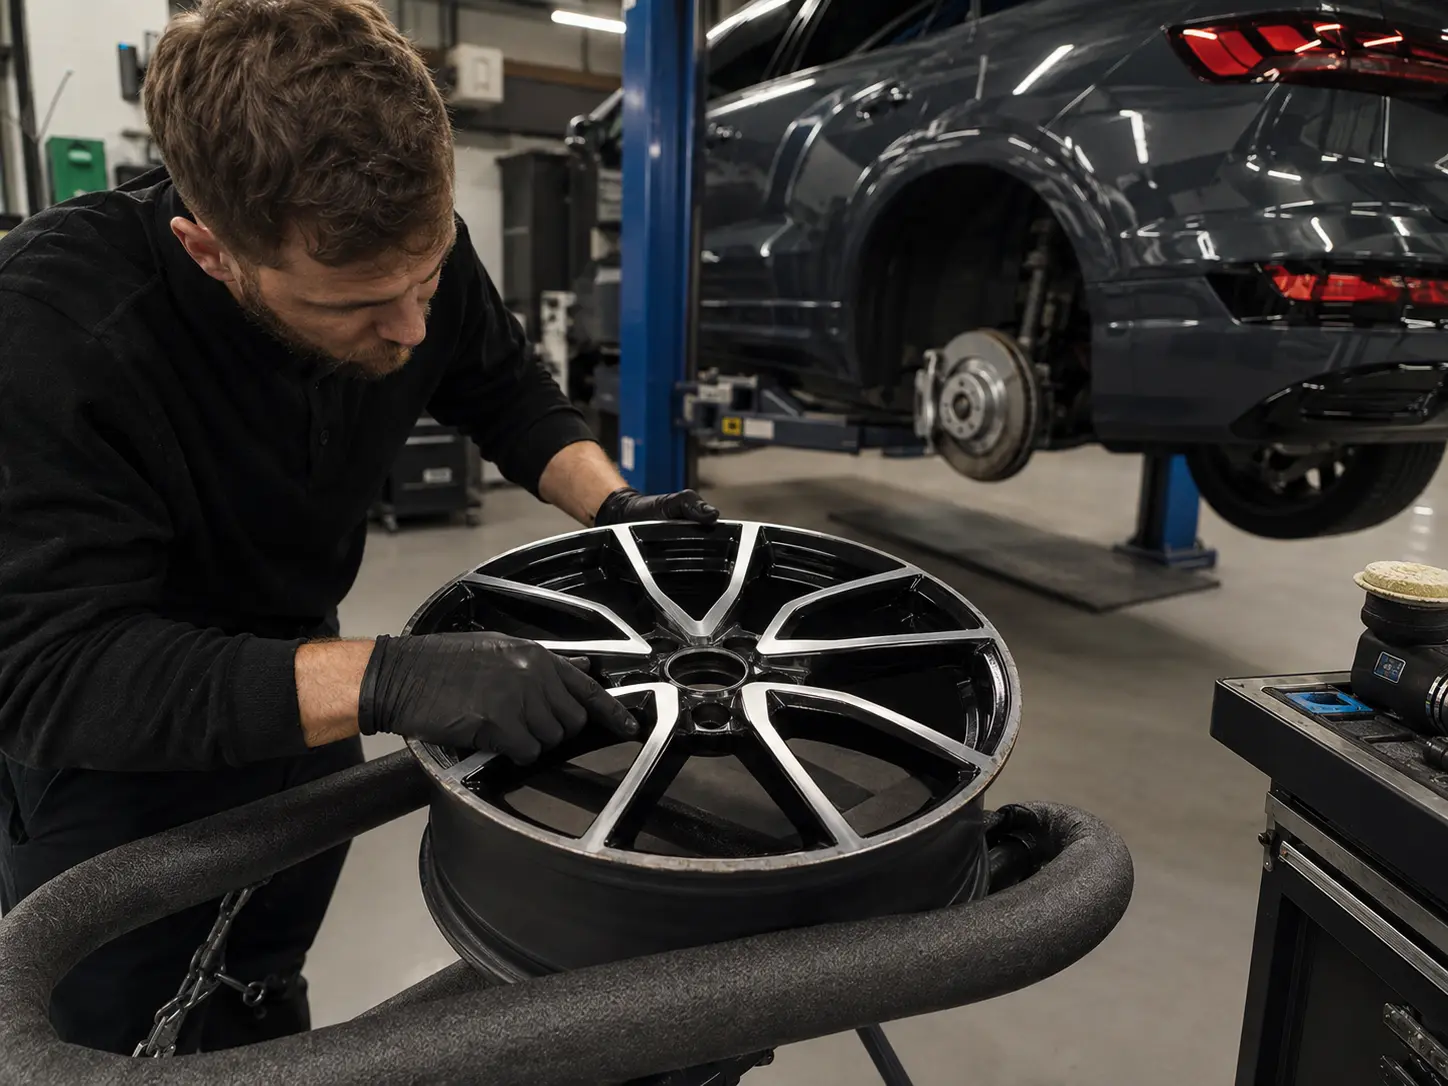
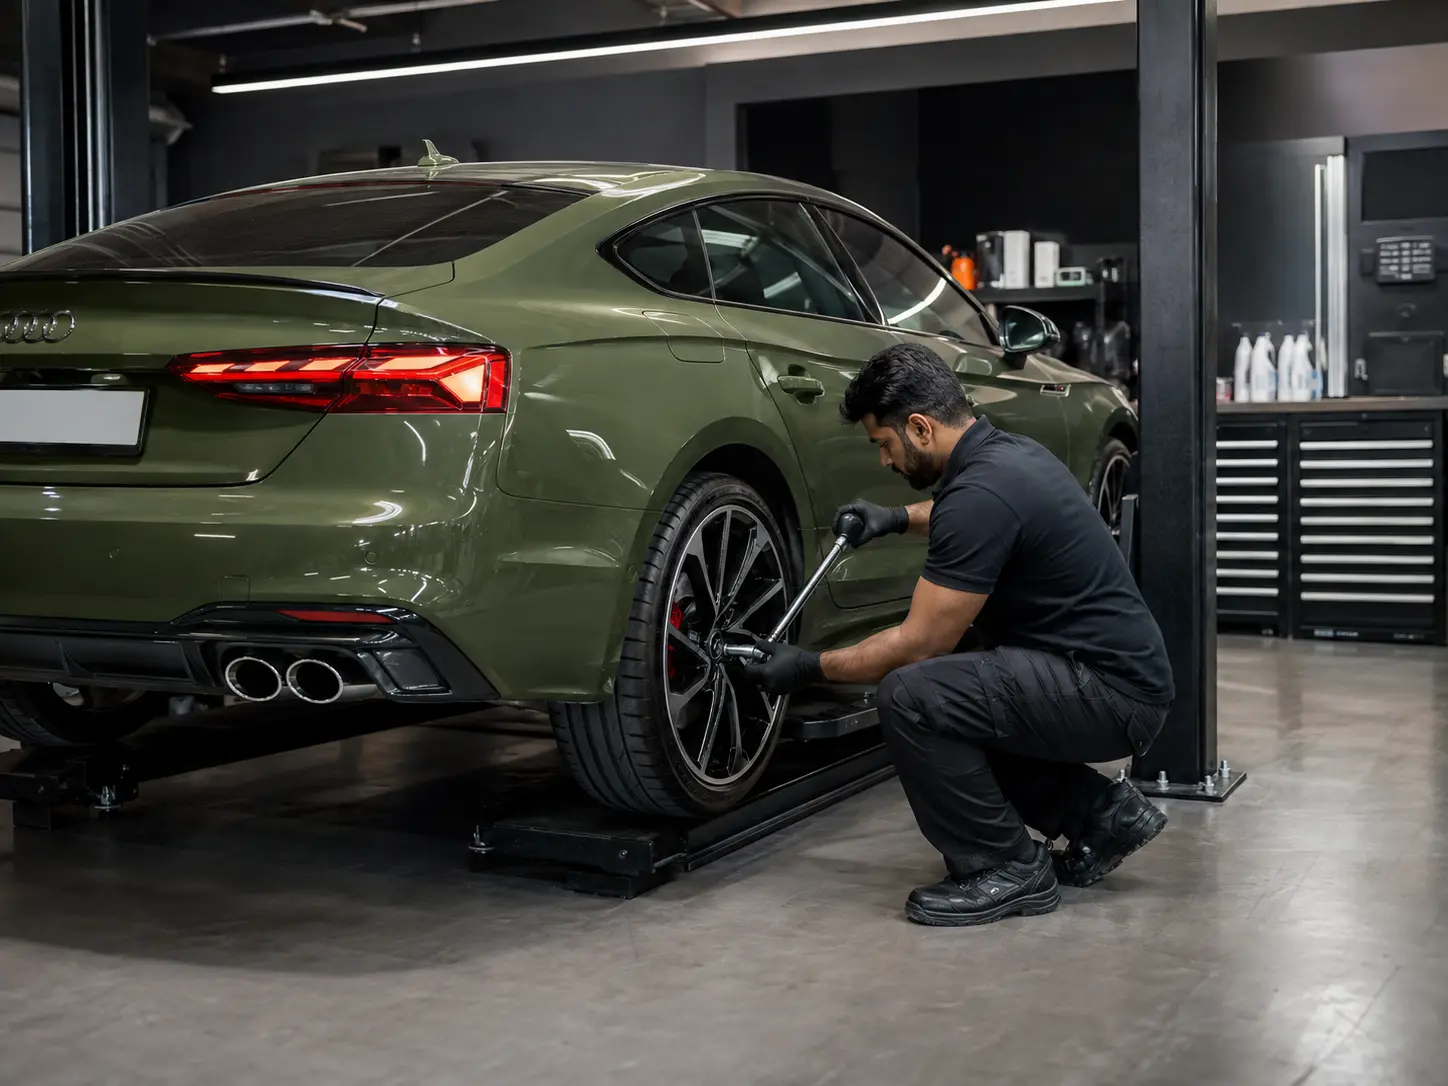
These current-model workshop scenes show three separate moments. The wheel is measured, the finish is examined away from the car and the completed assembly is verified during fitment.

Technician measuring alloy wheel runout on a current Audi A5
Check circular accuracyA gauge helps quantify deformation while the tyre, hub and mounting condition remain part of the diagnosis.
Technician inspecting wheel surface condition for a current Audi Q6 e-tron
Read the finish closelySurface preparation depends on damage depth, coating type and the agreed visual result.
Technician verifying wheel fitment and fastener torque on a current Audi S5
Complete the fitment checkSeating, tyre condition, pressure and fastening are reviewed before the car returns to normal use.
Damage has different meanings

Classify the wheel concern

The phrase rim repair can refer to a small surface mark, a finish problem, a loss of roundness or structural damage. Those are not interchangeable jobs, and a price from one photograph should not be treated as a final safety decision.

A damaged-looking wheel is not automatically repairable. The workshop must consider location, depth, deformation, prior work and any limit that makes replacement appropriate.

Curb rash on the outer face
Photograph the full wheel and the affected lip in even light. The assessment should distinguish displaced metal from surface coating damage, then identify whether the design uses paint, a machined face or another finish that changes the restoration process.
Vibration after a pothole
Record the speed range, steering feedback and whether the tyre loses pressure. Wheel runout, tyre damage, balancing, hub condition and suspension movement can create similar sensations. Do not assume cosmetic refinishing will correct a geometry problem.
Slow air-pressure loss
Check the tyre for puncture and sidewall damage as well as the wheel bead seat and valve area. A bent or cracked rim is only one possible source. Repeatedly inflating the tyre without locating the leak can hide a developing safety concern.
Crack or sharp impact mark
Avoid driving until the wheel and tyre are reviewed. Crack position, length, previous repair, heat history and spoke or mounting-area involvement affect whether any repair should be considered. Some damage should lead directly to replacement.
Peeling or discoloured finish
State whether the issue followed cleaning chemicals, heat, earlier refinishing or brake contamination. Finish restoration can improve appearance, but it must not be presented as structural repair when the wheel shape and material remain in question.
One replacement looks different
Provide photographs of all four wheels and the exact design. Colour, gloss, machining direction and age-related fading can make a technically sound single-wheel finish appear mismatched. Agree the visual tolerance before work begins.

A transparent wheel decision

Use evidence to choose the outcome

The table turns common wheel observations into questions an owner can approve. It does not declare every damaged Audi rim safe to repair.

Wheel findingAssessment evidencePossible direction
Shallow face rashDamage depth, edge profile, finish type, surrounding coating and desired colour match.Prepare and restore cosmetically if material and design remain suitable.
Measurable radial runoutGauge result, tyre variation, bead seating, hub face and impact history.Evaluate correction limits or replace when shape cannot be restored appropriately.
Pressure loss at beadLeak location, bead-seat condition, tyre age, corrosion, valve and visible deformation.Repair the verified source only after wheel and tyre suitability are confirmed.
Crack near a spokeExact position, length, propagation, earlier welding evidence and mounting-area proximity.Decline or escalate when the structural risk makes a routine repair unsuitable.
Previously refinished surfaceCoating thickness, colour mismatch, machining evidence, filler and heat discolouration.Agree a realistic visual target or source a matching replacement instead.
Vibration remains after balancingWheel and tyre runout, road-force context, hub seating, bearing and suspension checks.Investigate the complete rotating assembly rather than refinishing again.
Select the right wheel route

Separate repair from replacement

The estimate should state which type of work is proposed and what evidence supports it. Every wheel follows its own condition, material, design and previous-repair history.

01

Cosmetic face restoration

Suitable assessment begins with the depth and location of rash or coating damage. The method should preserve edges, lettering areas, lug seats and the intended visual profile instead of simply burying marks under heavy material.

Return to Audi repair
02

Runout and shape measurement

A suspected bend needs measurement on suitable equipment. The result should distinguish wheel distortion from tyre variation, incorrect seating, hub contamination or another road-contact fault.

Review Audi tyre support
03

Crack condition review

Location, extent and earlier work must be documented before a structural method is discussed. A workshop should decline a repair when the damage or applicable limit makes the result unsuitable.

See inspection services
04

Replacement wheel sourcing

When replacement is preferred, confirm size, width, offset, mounting pattern, load suitability, finish, sensor context and reference. A visually similar Audi wheel may not be the correct part.

Explore parts support
05

Finish specification

Choose the colour, gloss and surface treatment before preparation begins. Machined-face, polished and multi-layer finishes need different expectations from a solid painted wheel.

View paint services
06

Refit and final check

Inspect mating surfaces, tyre condition, pressure, valve or sensor context and wheel fasteners. Where vibration prompted the visit, verify the road-contact system rather than judging only the fresh appearance.

Schedule an assessment
Design and fitment matter

Identify the Audi wheel precisely

Audi wheels vary by diameter, width, offset, mounting detail, finish and model equipment. Performance brakes, tyre sizes and suspension packages can limit substitution. Send a photograph of the complete wheel and the inside reference markings when safely accessible.

Original, accessory, aftermarket and replica wheels can require different sourcing and repair decisions. The workshop should record what is actually fitted instead of assuming that every car retains its factory setup.

Treat tyre condition as linked evidence

A rim impact can pinch a tyre, damage a bead, create a sidewall defect or alter balance. Tyre age, pressure history and matching across the axle should be considered during the same inspection.

Electric and large SUV models can place different load demands on wheels and tyres. Do not copy a repair or replacement choice from a smaller Audi without confirming suitability.

  • A and S modelsConfirm diameter, width, offset, brake clearance and whether the finish is painted or machined.
  • RS vehiclesDocument performance brake clearance, tyre specification, prior track use and any non-standard wheel.
  • Q5, Q7, Q8 SUVsInclude load context, impact history, tyre pressure loss and suspension symptoms.
  • Q6 e-tron and EVsCheck wheel and tyre suitability for the exact electric model rather than appearance alone.
  • Aftermarket fitmentsProvide brand, model, reference, fastener type and any spacer or adapter information.
Look after the road-contact system

Protect the wheel after repair

Aftercare is partly visual and partly mechanical. The owner should know what was done, what remained unchanged and what symptom would justify another inspection.

Allow the finish to settle

Follow the written advice for washing, chemicals and curing time that applies to the chosen coating. Avoid harsh cleaners or brushes until the finish is ready for normal care.

A fresh surface can be damaged by aggressive wheel cleaner even when the underlying restoration was completed correctly.

Monitor pressure accurately

If the original complaint included air loss, record cold tyre pressures and recheck at the advised time. A stable cosmetic appearance does not prove the bead, valve or tyre is sealing correctly.

Return promptly if the same wheel continues to lose pressure or if a sidewall bulge becomes visible.

Notice vibration changes

Compare the steering and seat feedback at the same road speeds that previously revealed the concern. Tyre flat spots, hub seating, wheel runout and chassis issues can remain after surface work.

Do not chase a vibration through repeated balancing without a documented rotating-system review.

Record the final specification

Keep the wheel size, reference, colour description and work performed with the invoice. This helps if a later replacement or matching repair is needed.

For non-standard wheels, retain the offset, width, fastener and load information instead of trusting a badge-only catalogue entry.

Inspect after a new impact

A sharp pothole or curb strike can damage the wheel, tyre and suspension even when the surface mark appears small. Photograph the area and describe any pressure or steering change.

An earlier repair does not make a wheel immune from fresh damage or automatically responsible for every later symptom.

Avoid appearance-only approval

Review the completed face in normal light, but also ask what measurement and fitment checks were performed. Road-contact safety cannot be established by a shiny surface.

If a structural concern was declined, keep that decision with the vehicle record and do not move the wheel to another axle as a workaround.

A wheel-specific workflow

Take the rim from symptom to result

Each stage preserves the distinction between visual restoration, measured correction and a replacement recommendation.

  1. 01

    Share the damage

    Send full-wheel and close photographs, tyre pressure history, impact details and the speed range of any vibration.

  2. 02

    Inspect and measure

    Review the wheel and tyre, record runout or leakage evidence where relevant and identify the existing finish.

  3. 03

    Approve the method

    Confirm repairability, visual expectation, timing, replacement options and every condition that could stop the job.

  4. 04

    Refit and verify

    Check seating, pressure, fastening and the original complaint, then document the work and aftercare.

Photographs that help

Prepare a useful rim enquiry

Good images can route the booking, though they cannot prove hidden structure or exact runout.

Show the complete face

Take one square photograph that includes the entire wheel, tyre and valve area. This reveals spoke design, finish, damage position and whether the visible mark continues beyond the close-up crop.

Add side and lip views

Photograph the outer and inner edge from an angle without crawling beneath an unsupported vehicle. Include a sidewall view if pressure loss, pinching or a pothole impact is part of the complaint.

Describe driving feedback

State whether vibration reaches the steering wheel, seat or body and the speed at which it begins. Note pulling, noise, pressure warnings and any change after tyre replacement.

Name the desired result

Explain whether the priority is safe assessment, shape correction, colour matching, curb-rash restoration or replacement sourcing. The quotation should not quietly substitute one objective for another.

Before preparation begins

Agree what rim repair means

Ask whether the proposed work is cosmetic refinishing, measured shape correction, leak-related repair or replacement. Confirm what will be checked before material is removed and what finding would make the workshop stop.

Review the selected finish, expected colour tolerance, tyre handling, balancing, refit method, written terms and handover checks. Decline any promise that every crack or bend can be repaired without inspecting its location and severity.

Audi wheel questions

Clarify the rim decision

The answers below explain inspection boundaries and preparation. Repairability remains a wheel-specific judgement after examination.

Can curb rash on an Audi rim be repaired?

Many surface marks can be assessed for cosmetic restoration, but depth, edge condition, finish and previous work must be reviewed before a method is confirmed.

Can every bent Audi wheel be straightened?

No. Measured deformation, location, material condition and applicable limits may lead to replacement instead of correction.

Is a cracked rim safe to drive on?

A visible crack can affect pressure retention and structural integrity. Avoid driving and arrange an assessment before further use.

Why does the Audi still vibrate after balancing?

Wheel or tyre runout, hub seating, tyre variation, bearings, suspension and driveline factors can remain. The rotating assembly needs a broader check.

Can one refinished wheel match the other three?

A close match may be possible, but age, previous coatings, machining and light can reveal differences. Agree the visual tolerance in advance.

Do you check the tyre during rim repair?

The tyre, bead, valve, pressure history and impact evidence are relevant because wheel and tyre damage can occur together.

Should I buy a replacement Audi wheel first?

Wait until the size, width, offset, reference, finish, brake clearance and exact fitment are confirmed.

Where can I request Audi rim repair?

Wheel assessments are arranged through the FCP workshop in Al Quoz 4, Dubai. Send photographs before visiting.

Start with the damaged wheel

Request an Audi rim assessment

Send full-face and close photographs, the Audi model, wheel size, tyre-pressure history and any vibration or impact details. An advisor can identify the suitable first assessment without promising a finish or structural outcome.