Surface restoration
Best for limited fading, dye transfer, light scuffs or finish loss when the leather or synthetic base remains strong. The area is cleaned, prepared, recolored and protected. Deep cracks cannot be hidden reliably with color alone.
Leather, seat and interior trim craftsmanship
Restore worn leather, torn seat panels, split stitching, sagging headliners and damaged interior trim without replacing more material than necessary. Start with a free inspection in Al Quoz 4, Dubai, compare the available finishes and receive an itemized upholstery estimate.
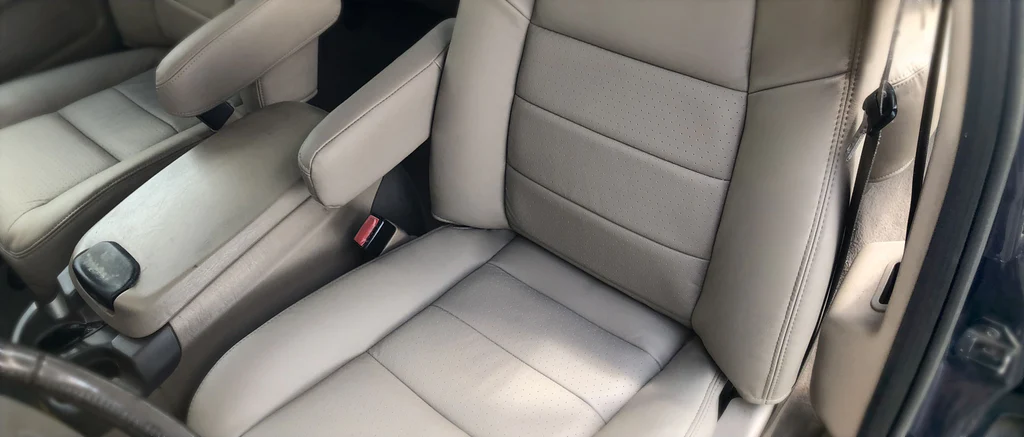
Start with the damaged layer
A good upholstery decision starts with what has failed. Surface color loss, a broken seam, weakened leather and collapsed foam can look similar in a photograph, but they need different labor and materials.
Best for limited fading, dye transfer, light scuffs or finish loss when the leather or synthetic base remains strong. The area is cleaned, prepared, recolored and protected. Deep cracks cannot be hidden reliably with color alone.
Suitable when thread has failed but the surrounding panel can still hold a durable seam. Access, perforation and seam position affect whether the cover can be repaired in place or must be removed.
Chosen for tears, heavy bolster wear or brittle material that will not support a local repair. Replacing only the affected panel can retain more of the original interior while restoring strength.
Needed when the seat looks uneven, feels collapsed or no longer supports the occupant correctly. Foam shaping and support work are evaluated separately from the visible cover and seat electronics.
A free workshop inspection identifies the material, damaged area and realistic finish. A model name and a short description are enough to request an appointment. Photos are optional, although a full-seat view and a close-up can help us prepare material choices before you arrive. For broader interior work, review our car upholstery repair service. If collision damage also affects exterior panels or trim, the Lincoln body shop can assess the related work.
Plan by repair area
These ranges cover common interior jobs in Dubai. The written estimate confirms material grade, color work, removal, refitting, labor and VAT treatment for the selected repair.
| Upholstery work | Estimated price | What the range normally covers |
|---|---|---|
| Local leather color restoration | AED 425 to 850 | Preparation and recoloring of a small worn area or bolster section. Tears, failed foam and large cracked areas require another option. |
| Split seam or stitching repair | AED 350 to 750 | Opening access where required, restitching a defined seam and checking the repaired area. Weak surrounding material or safety seams change the work. |
| Single bolster or cushion panel | AED 900 to 1,800 | Matched replacement material, panel cutting, stitching, fitting and finish checks. Perforation, piping and unusual grain can increase sourcing costs. |
| Seat foam shaping or support repair | AED 600 to 1,200 | Removal needed to reach the damaged cushion, local foam or support correction, reassembly and comfort check. Frame and electrical repairs are separate. |
| Front-seat retrim | AED 1,600 to 3,200 per seat | Broader cover work using the selected leather or synthetic material. Complex patterns, ventilation holes, logos and extra panels affect the total. |
| Lincoln headliner replacement | AED 1,250 to 1,650 | Headliner material and normal installation. Panoramic roofs, damaged backing, pillars and extra trim pieces may require additional work. |
| Door insert or armrest repair | AED 500 to 1,200 | Defined trim area, material, adhesive or stitching work and refitting. Broken substrates, clips or switches are quoted separately. |
Prices vary with the Lincoln model, repair area, leather or synthetic specification, color matching, perforation, foam condition, seat removal and electrical features. Our pricing can be 65% to 70% lower than agency pricing when the material and work being compared are equivalent. The free inspection costs AED 0. Any extra work is presented before it is added.
Three cost scenarios
These are typical job estimates for planning, not confirmed workshop records or fixed offers. Your final amount depends on inspection, material choice and the condition beneath the cover.
Typical job estimate
Driver-seat outer bolster panel replaced using matched perforated material. This estimate includes panel preparation, stitching, fitting and a check of the surrounding seat finish. Foam reconstruction or seat-electrical work would be separate.
AED 1,450
Typical job estimate
Front-seat split seam repaired with a small bolster-foam correction. The seat cover is opened only as needed, the seam is rebuilt, the cushion shape is corrected and the seat is rechecked after assembly.
AED 980
Typical job estimate
Sagging headliner material replaced with normal roof-trim removal and refitting. The figure assumes a usable backing board and excludes broken clips, sunroof repairs and damaged pillar coverings.
AED 1,450
Keep original material or retrim?
A local repair is valuable when the affected material is still flexible and the damage has stable edges. It retains more original trim, reduces dismantling and usually costs less. It may not be the best choice when old coatings, extensive cracking or stretched leather extend beyond the visible spot.
Replacing one panel is often the middle option. The damaged bolster or cushion section is removed and recreated while adjacent panels remain in place. The new piece should be compared for color, grain, gloss, perforation and stitch detail under daylight and normal cabin light.
A broader retrim becomes sensible when several panels have failed, the original material has become brittle or a previous repair created inconsistent color and texture. The quote should show which panels are included so a single-seat price is not mistaken for a complete interior package.
Comfort and safety below the cover
Lincoln seats may combine powered movement, memory, heating, ventilation, occupancy sensing, belt equipment and side-airbag components. Upholstery work must respect those systems whenever covers or cushions are removed.
Existing warnings and supported seat functions are checked before trim is disturbed. Connector routing, clips, foam position and earlier repairs are noted during removal. If the booking includes only upholstery, a pre-existing electrical fault remains a separate diagnostic item rather than being hidden inside the trim price.
An airbag seam, occupancy mat or belt-related area cannot be treated like ordinary decorative stitching. The location and construction determine the proper method. If the repair needs specialized safety-system work, that requirement is explained before the cover is altered.
The visible finish, movement, warning status and any functions included in the booking are checked after refitting. A completed handover should identify the repaired panel and distinguish it from unrelated electrical or mechanical issues.
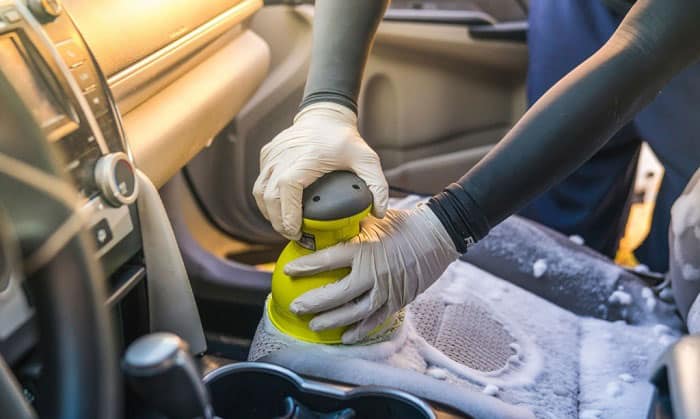
Material matching
Interior materials change with sunlight, body oils, cleaning products, friction and age. A factory color name does not guarantee that new material will look identical beside a panel that has been used for years. The repair is judged against the actual cabin, not only a catalog swatch.
For a local color repair, the surrounding finish may be blended over a controlled area to reduce a sharp transition. For panel replacement, the material should be compared for grain scale, softness, perforation and sheen. Stitching and piping also influence whether the new work looks intentional.
We explain visible limitations before you select the option. The objective is a clean, durable and balanced result, without promising that every aged surface can become indistinguishable from a newly manufactured interior.
Interior differences by model
The damaged panel matters more than the badge alone, but model and trim information helps us prepare for seat size, perforation, electrical features, roof layout and material sourcing.
Large seating areas, multiple rows, powered functions and extensive leather trim can make panel-by-panel planning more economical than quoting the entire cabin. Captain’s chairs, third-row use and door trim should be listed separately.
Perforated seating, ventilation and complex adjustment features require careful cover removal. A bolster repair should be evaluated beside the cushion and backrest so the finish remains balanced.
Daily-use bolster wear, dye transfer, console trim and headliner concerns can often be divided into individual jobs. The estimate identifies each affected area instead of combining all interior work into one vague total.
Sedan seats may show edge wear, cushion creasing, seam failure or foam changes. Material age and availability determine whether local restoration or a replacement panel offers the cleaner result.
Trim names and material combinations can vary. If a particular panel or seat cover must be sourced, the vehicle identification details can be checked after your initial inquiry.
Previous dye, non-original material, altered stitching or repaired foam affects the new work. We inspect what is present and price the correction required rather than assuming the interior is factory-original.
From inspection to handover
The process keeps the visible finish, hidden support and any seat functions connected to one clear estimate.
We identify the material, damaged layer, surrounding wear and any seat function related to the work.
You review local repair, panel replacement or retrim choices with estimated prices and finish expectations.
Material, color, stitching and access requirements are confirmed before cutting, coloring or dismantling.
The agreed area is restored, restitched, rebuilt or retrimmed using the selected specification.
Fit, appearance and relevant seat functions are reviewed before the vehicle is returned.
Free pickup and delivery are available. Our van can also provide a dedicated on-site inspection when seeing the vehicle at your location is helpful. On-site inspection arrangements are separate from the free workshop inspection. Share the Lincoln model, the affected seat or trim area, and your preferred visit or pickup details to start.
Protect the repaired finish
Follow the specific curing time provided at handover before cleaning, conditioning or heavy use. Fresh color coatings, adhesives and newly shaped foam can have different early-care requirements.
Use automotive interior products suitable for the repaired material. Household solvents, strong degreasers, abrasive pads and unknown coatings can strip color or change gloss. Test any new product on a hidden area and avoid soaking perforated leather or electrical controls.
Dubai heat and sunlight accelerate dryness and fading. Covered parking, a windshield shade and regular gentle cleaning can reduce stress on leather and synthetic trim. Remove sand and dust before wiping because particles can act like an abrasive on bolsters.
Questions about the finish
Often, yes. Surface restoration or replacement of one bolster panel may be suitable when the remaining cover is strong. Inspection determines whether a smaller repair will be durable and visually balanced.
We compare color, grain, softness, gloss, perforation and stitching with the surrounding trim. Aging can prevent a perfectly identical match, so the expected blend is explained before work begins.
Yes, headliner replacement can be quoted after checking roof size, sunroof or panoramic-roof openings, backing condition, pillars and related trim pieces.
Not automatically. Upholstery access and electrical diagnosis are priced separately when a warning, heater, ventilation fan, wiring issue or control fault is involved.
A small repair may need less time than a panel replacement, foam rebuild or full retrim. Material availability, curing time and seat removal affect scheduling. Your estimate includes the expected completion window.
The workshop inspection is free. Tell us the model and damaged area to book. Dedicated on-site inspections can also be arranged when appropriate.
Yes. Free pickup and delivery are available. Share the collection location and any seat or vehicle condition that may affect access.
Choose your upholstery finish
Send the model and damaged area, or visit Al Quoz 4 for a free inspection. We will compare the practical repair choices and provide the price before material is ordered.